Welcome!

Thanks for stopping by!
We are two house-loving DIYers now onto our second house. One of us has vision...and one has actual skills.
Design and working on our home are our major hobbies, whenever we have a few moments of free time not devoted to our daughter or jobs. We are hoping to share our ideas, triumphs and mistakes to help other DIYers and get new ideas from all of you!
Showing posts with label Lighting. Show all posts

Friday, November 3, 2017

Library Built-in Bookshelves Progress

One strategy of DIY-ing with a small child is to get the small child out of the house. In order to enable Brent to be able to set aside some dedicated time to work on the library (and the painting of all the hallways, but I'll talk about that in another post), I have been taking Tessa to a 9:00 Barre3 class followed by her 10:30 gymnastics class every Saturday morning.  Or I have taken her out of state for the whole weekend. This dedicated time has allowed Brent to make some serious headway on the library's built-ins, and I love being exercise buddies with Tessa.


After we had assembled the Ikea bookshelves, Brent started to work out how to build them in in such a way that they would make sense with the original mantle and trim in the room.  Step 1 was to raise the bookcases up so that the baseboard trim will be able to continue around the base of the bookcases.  Next, Brent built boxes to separate the upper added on parts from the top of the Ikea bookshelves.  This is also where the wiring for the lights runs (you can see the boxes above the wider sections). Some strategic painting has also happened so that the outside edges won't need to be painted in place.


Tessa did get to help out on this part.

Next came some more of the tinted primer. (Again, this is NOT the final color - this was tinted NY State of Mind, and our final choice is Washington Blue)


Next step: base molding is in the works!


I had a very difficult time choosing lights - partially because the picture-light style fixtures I have been eyeing are just so expensive! There was no cheap way around this one...and on top of that, all the options I liked were out of stock.  It was starting to look unlikely that we would have lighting for our upcoming holiday party! (We use our two annual parties as hard deadlines for house projects) Wayfair's back-in-stock-notification to the rescue!


Funny thing - I just tried to link the lights here...and they are already sold out again!  Luckily, ours arrived on Halloween. I can't wait to see them in action.

So, I believe the steps we have left are:

1. The vertical trim
2. The middle trim (continuing the dental molding on the fireplace around the bookshelves)
3. Top trim (a stand-alone, fairly substantial crown molding, I believe)
4. Paint
5. Install the lights
6. Find knobs for the drawers that I love
7. Move rug, sectional, chair, end tables, lights back in
8. Purchase new coffee table (I'll gladly take your ideas on this one)
9. Move TV back in on its current stand for the moment
10. Artwork on wall
11. Style bookshelves

OH WAIT....

we still need to figure out window treatments that will also be in the Living Room...they have to be mounted outside the trim...I will accept ideas here as well! I'm 90% sure I want bamboo shades like in my inspo pics...

I'm wondering JUST how expensive this will be to pull off for 6 rather large windows :(.

Posts coming soon:

  • The painting of the upstairs and downstairs hallways and main stairwell (including an engineering feat)
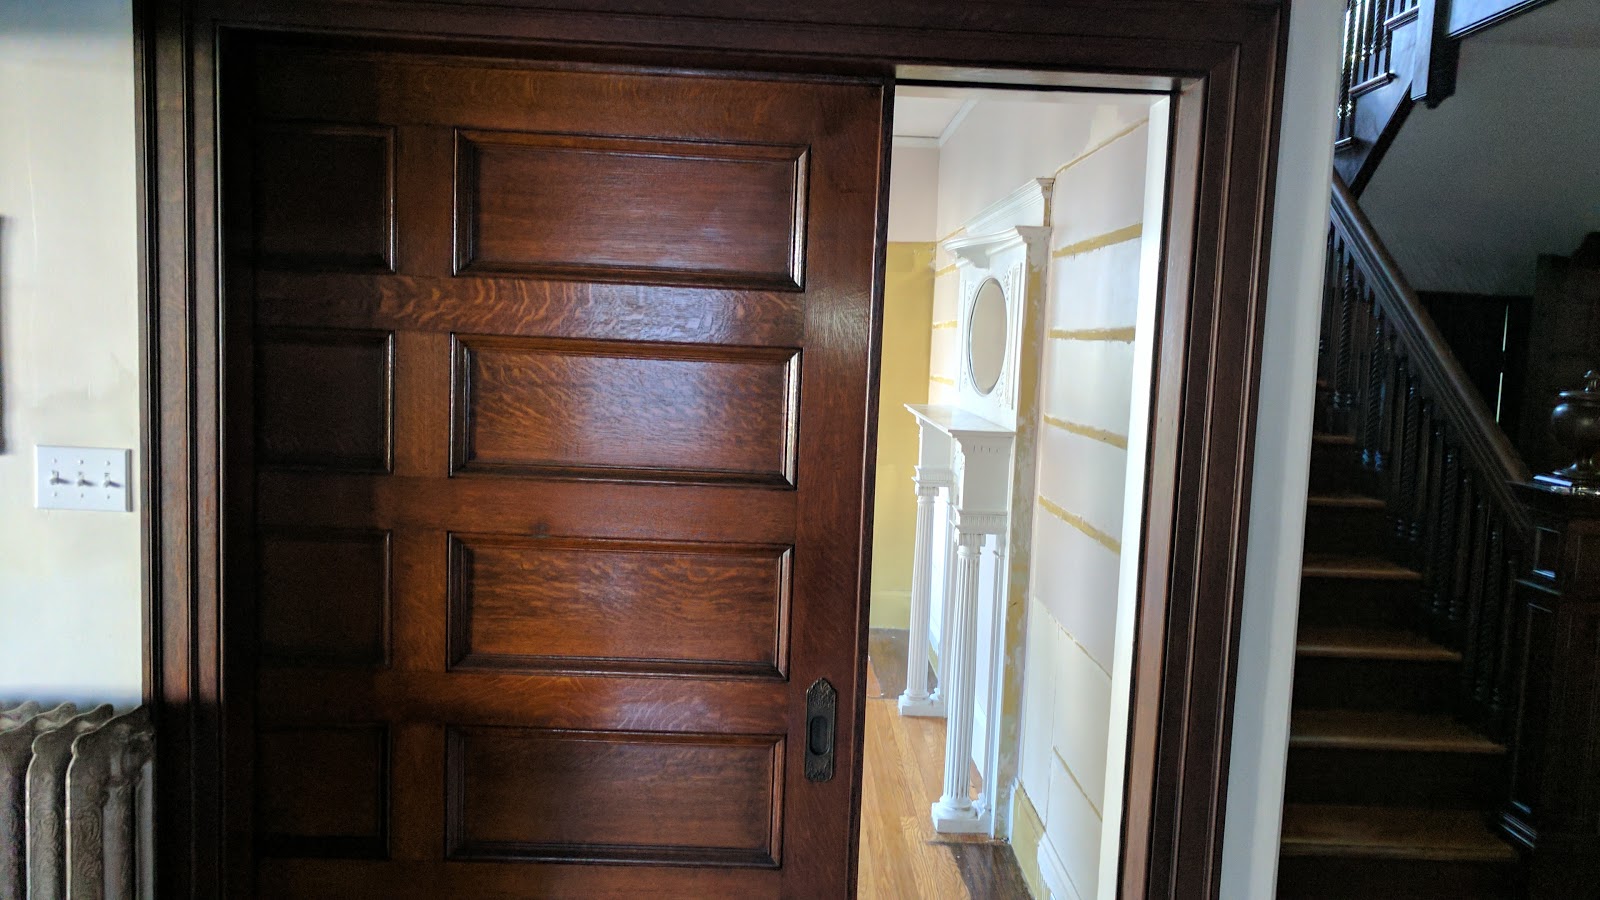
  • The front door refinishing and shutters


Thursday, August 10, 2017

One year in/The Big Catch Up Post

Sunday night Brent and I snuck out for a date night at Flank, which was actually where we had gone for a date night shortly after having our offer accepted on this house a little more than a year ago.

It was delicious again, by the way - totally recommend.  It being a Sunday night in the summer, the restaurant was basically dead - sad for the restaurant, but lovely for us and the very helpful bartender whom I think (hope?) we saved from tears of boredom.

We started the evening (ok, it was late afternoon) with making a list of everything that has changed in the house in the past year.  Then I looked at the blog...and realized that I hadn't mentioned about...80% of the list. So here's us picking up where I left off LAST OCTOBER.  If you want a bigger post about any of the projects breezed through here - let me know in the comments and I'd be happy to oblige. In the meantime, this post is to get the list up here, and I promise to pick up with our current project in full sentences - The Library. Ok, so here we go! In the last year, here's what has happened to the house so far.

Landscaping and Irrigation and Outdoor Furniture


Front Door and Shutters
Brent has stripped the front door back to its beautiful natural state. He also took down the existing shutters, repaired them, and painted them a crisp, glossy black.


Roof Repairs and Chimney Capped
Historical Slate Roofers inspected our roof and made some repairs that were sorely needed, as well as replaced the roof over the porch and capped the chimney.


Window Restoration
  • Fred Sullivan of FPP Window Restoration and Insulation Services has restored all windows on the first and second floors (minus the kitchen) between last summer and this summer
  • This means they all function and have been cleaned up/adjusted to work to best advantage
  • We also restored the Palladian window in the master bathroom with frosted glass instead of clear for an added layer of privacy and uniform look.


Foyer
My mother-in-law was patient enough to tackle my first-ever stenciling project with me over Christmas...it was definitely an eye-opening experience and a test of patience. I'm very pleased with how our focal wall came out! The deep green is color-matched to Ralph Lauren's British Racing Green. I have some plans to change out the rug and console table to have some lighter contrast against the dark paint and wood trim.


Powder Room
  • Ceiling pulled down, insulated, and replaced
  • Crown molding installed
  • Walls fixed
  • Heater cleaned up and painted
  • Window and trim painted (Benjamin Moore White Dove)
  • Walls from...brick/blood red to Benjamin Moore Gentleman's Gray
  • Shelves from CB2
  • New toilet paper holder and towel ring
  • Ugly tile floor covered under a Home Goods find.
  • Mirror, sink and toilet are temporary placeholders


Mudroom

  • Ceiling pulled down
  • Spray insulation installed
  • Ceiling replaced
  • Walls repaired
  • Painted Benjamin Moore Revere Pewter (which was mistakenly purchased when we painted the Living Room...)

Butler's Pantry

  • Countertop replaced last summer with Carrara marble
  • Under-cabinet LED lighting installed (by electrician)
  • Walls and ceiling repaired and painted (walls are Benjamin Moore Palladian Blue to match Dining Room)
  • Mirrored tiles are going into the back of the cabinets to: 
    • increase the light and apparent width of the room
    • add some pizzaz
    • avoid extensive and tedious plaster repairs at the back of the cabinets :)


Dining Room

  • Wallpaper stripped (painfully)
  • Walls repaired, primed and painted Benjamin Moore Palladian Blue.
  • Lamps for the buffet and green end chairs scored at Home Goods

  • I'm still saving up for my dream wallpaper to go into the framed panels...


Living Room

  • Wallpaper scraped (painfully)
  • Walls repaired and painted twice after a paint buying oops.
  • Final color is Benjamin Moore Edgecomb Gray
  • Couch, chair, rug, stools, tables, lamps purchased
  • Throw pillows in the fabric of above wallpaper etsy-ed
  • Final decorating touches will be happening once the library is done, as right now the living room has most of its furniture in it.


Liz's Office

While I have yet to fully settle into my office/unpack all of the boxes from the move, it has been painted an furnished. Here is my Pinterest Inspo Board for the space. Brent repaired the ceiling and walls last fall which got a fresh coat of Warm Blush Benjamin Moore paint.  I put in a daybed with trundle for use by guests, and got two console tables, a new rug and curtains, and am still happily using my grandmother's desk. Hopefully I can make some headway in unpacking before school starts up again...hopefully.


2nd Floor Bathroom

  • Removed and reinstalled ceiling
  • Vent/light combo installed
  • Repaired walls
  • Cabinet from living room relocated for storage
  • Painted Benjamin Moore Chelsea Gray


  • This room was all Brent, including picking out the paint color. I personally think it reminds me of a Parisian Bistro/Bar with the black and white tile, dark walls, and touches of dark wood. - are we surprised? I have yet to find artwork for above the tub - any suggestions?

    Lighting Switches

    As we work through the spaces and live in the house, it has been come very clear which areas need dimmers, so little by little we are installing them. They really are game-changers for the ambiance and the frequency that you will actually turn a light on. For example, the upstairs hallway light is TOO bright at full strength, and was therefor rarely used...until Brent changed the switches! Currently we have dimmers in the:

    • main entryway
    • living room
    • dining room
    • bulter's pantry under-cabinet lighting
    • kitchen
    • stairway sconces
    • hallway lights upstairs
    • all bedrooms
    • master bathroom

    Phew...

    I'm sure I have forgotten a few projects here and there, but I can finally cross update the blog off of my to-do list!

    Your next installment will focus on The Library. In the meantime, you can check out my Pinterest board dedicated to it here.  The room has been cleared out, and a high-powered vacuum and sander have been purchased..


    Thanks for reading, and please let me know if you want more info on a project of where I got something.


    Saturday, September 10, 2016

    Right light, wrong color.


    When I found the light I wanted for our bedroom, I loved everything about it - the oversized scale, the geometric vibe, the airiness, but NOT the color options - it was either antique bronze or silver in stock and I knew I wanted something in the gold family.
    In the process of picking out...about 22 light fixtures, I thought - I can fix that later!  But then it was up...and the thought of taking it down to spray paint it seemed like a speed bump that could turn into months.


    The antiqued bronze was too much dark with the wood of the headboard/footboard of our new bed, the dark wood trim that is in the entire house, and the dark navy of the curtains - as T would say, Same, Same! Too much matchy-matchy for my taste.  The room needs some lightening up and some bling.  Thankfully, Benjamin Moore's Glass Slipper paint is pulling its airy weight on the walls, but we need some metallic accents.  

    Enter Rub n' Buff.  The name...is too much, but I think it's basically oil-based paint mixed with wax. It comes in tiny tubes.  I got the Gold Leaf tone from Amazon - so cheap it was an Add-on item. I followed the directions, cleaning the light and letting it dry before I started applying.  I figured - about an hour? Silly Liz...so many surfaces/angles to cover!


    I used an old piece of cotton clothing I didn't want anymore to apply the stuff.  It said finger or cloth...I thought I'd try to keep clean. Again, silly Liz. It seemed darker than expected as I started to apply it, but I figured I was going for it now.  Unsurprisingly, the 2.75 year-old interrupted the process about an hour in and I had to go back later to finish, but I don't think that down time affected much. I probably would just cut my nails really short and use a finger next time (I think it will be under my nails for weeks despite the cloth and using nail polish remover to clean my hands afterwards).  As I got used to working with  the material, I think bare fingers would have made for an easier application. I was able to finish the application in about...2.5? hours.  Perhaps removing the fixture and spraying it would have been faster....but I do like the finish.
    Here is how it looked applied, but still drying and not buffed yet.


    It is already feeling much lighter!

    I will update the post tomorrow after I buff :)

    In case you're curious:
    Curtains (Overstock.com)
    Rug (Overstock.com)
    Bed (Jordan's furniture, but I believe it was discontinued...hence the deal :)

    Update:

    I'm unsure how much a difference my attempt at buffing made, but I think it's a little shinier?


    The lack of any flat surfaces made buffing feel futile, but I do think it helped. Seeing the gold in the room also inspired me to dig into the coat closet where ALL of our hanging pictures and mirrors are living for now and find Nonny's mirror.

    It had hung in her dining room, and then ours in the last house, but it felt perfect for between the two front windows. I'm getting used to using the picture rail trim - no holes in the walls is nice, but the tipping forward is slightly annoying.


    I think I might do spray paint for the bedside lights...to save time and dirty fingers.  I would ideally like to have sconces some day, but for now I'm more than happy to spray our very budget-friendly Ikea lamps.


    The master is inching closer and closer to completion!

    Remaining on the punch list:
    1. Find art to hang to left of the side window.
    2. Swap out the pulls on Brent's dresser for oblong round antique brass ones.

    3. Find new bedside tables - Brent made our current beauties, and I have plans for them in our to-be-furnished Living Room.  Plus, they are  too low with the new bed.  Since we have different amounts of space on each side, I doubt the new ones will match.  They are on my running list of things to hunt for in Home Goods etc.

    4. Long term - replace brown Ikea love seat I've had since my Southie apartment with a chaise.