Welcome!

Thanks for stopping by!
We are two house-loving DIYers now onto our second house. One of us has vision...and one has actual skills.
Design and working on our home are our major hobbies, whenever we have a few moments of free time not devoted to our daughter or jobs. We are hoping to share our ideas, triumphs and mistakes to help other DIYers and get new ideas from all of you!
Showing posts with label Kitchen Cabinets. Show all posts

Tuesday, March 19, 2013

Drawers are dreamy

Deep base cabinets are great for lots of storage - but they don't do much for accessible storage.  We have always kept our big pots and pans in the same lower cabinet - it was really deep and had an upper shelf of about 1/3 depth.  But...unless you wanted the top pot or pan or cookie sheet in the stack...a nightmare.  Brent made this great solution!


They are full-extension drawers.  He built a box that fits perfectly inside the cabinet, and the hardware attaches to the box.  So, the whole thing is removable, should anyone want to.  We have doors for that cabinet at the moment...but we'll see how that works. We might end up making drawer fronts instead so you're not opening two doors just to pull out a drawer.  As someone who did a lot of cooking today - this is a serious game-changer, and I totally admit that Brent was right - this was a worthwhile project, even if this doesn't end up being our forever house.

Wednesday, March 6, 2013

Final Steps to be Finished

Well, hello again.  It has been a while!  Yes, the kitchen has been lower on the totem pole these days with work back in full swing and vacations to take, but we are in the final push to complete the last steps!

Currently the doors and drawer fronts that Brent made are at the shop to be sprayed.  He has also built the final 4 drawers and installed 2 of them.


After that, some caulking fixes, paint touch-ups, hanging our open shelving, installing the soft-close hardware on the cabinets we had ordered, and we should be able to call our kitchen done!

The mudroom is functional, but Brent still wants to build a custom organization solution and we do still have the glass door we may or may not install.  We could also install trim above the cabinets...but we'll see :)

I cannot wait to take the official AFTER pictures.  Living in our new kitchen has made a huge difference for our house.  It is much more functional and just fun to be in.  We refinanced in December, and I'm sure that almost-finished new kitchen had a lot to do with our assessed value going up!  It feels really great to be almost done with such a monumental project that we did almost all of "our"selves (OK Brentselves).  What to do this summer?? Perhaps convert an upstairs closet to a powder room? Muah ha ha ha.

Sunday, December 9, 2012

Great Gray Grout

Hello again!  We're back...and still working on finishing up the kitchen little by little.  The new job has kept me pretty busy, and Brent has been slaving away as well, so the pace of work and documentation of said work is...a little slower.  Here's what you've missed:

1. The kitchen is now vented!  We can exhaust out through the roof.

2. The backsplash is sealed and grouted!

3. There are cabinet doors on the cabinets we kept!

Here are some pics from grouting.  We used Delorean Gray Sanded Grout from Home Depot.


The punch list is getting tiny!

  • fabricate the drawer fronts
  • spray all doors and drawer fronts that are going to be gray
  • install hardware on the new doors and drawers
  • trim above the cabinets
  • paint touch ups
  • installing the open shelves
  • the door to the mudroom (size, paint, install, hardware)
  • installing the rest of the soft closes
It was especially lovely to welcome many friends and family into our home yesterday for a little Holiday Party an d put the kitchen through its paces.  What a difference it made!  Counter space...a great place to sit and chat...a sink big enough to do all the dishes...as if we didn't already love throwing parties enough!


A post dedicated to the doors and drawers Brent is making/has made will be next!

Saturday, September 22, 2012

Drawer making and one change

Clearly our reno pace has slowed, thanks to two full-time jobs and some lovely company.  But, progress is still being made!  Brent is currently in the midst of building the replacement drawers for the lower base cabinets that we kept.  Instead of just changing the fronts of the old ones that were not solid wood construction, nor full extension, he decided to build them from scratch and get new hardware that is full-extension and soft-close.  

First, he had to plane all of the wood he was going to use. (He is starting with a batch of 3 drawers to begin with.)  Then be built them and finished them with polyurethane, linseed oil, and thinner.


The other house business that happened this week was one last electrician visit.  Peter was coming to install the special-order dimmer switch for the sink wall's under cabinet lights...and I had one more little job for him... 

Considering all of the decisions that had to be made, mostly before they could be tried in the space due to our time restrictions, I have loved almost every single thing we have put into the kitchen. I love the counters.  I love the gray base cabinet color.  I love the backsplash. I love the stainless island.  I love the ceiling.  I love the paint color.  I love the knobs and pulls, the sink, and the curtains.  Only ONE element has given me pause, now that it is in the space....the pendant light.  

I had originally been looking exclusively at dark metal lights, to tie in the lighting in the dining room, to give the kitchen a not-so-new feel, and to tie in the black on our fridge and stove....but then I let bargain-hunting get in the way...and I bought the beautiful, but TOO modern and shiny original light choice. (And it was hung too high originally, but that of course was fixable.)


I do love that light; it's just not the perfect fit for our kitchen.  It was a little too small, too shiny, and too "new" feeling.  Soooo I may have ordered a new light behind Brent's back. :)  Come on, I fought hard for that pendant light and I'll be darned if I don't loooOOOoooooOOOoove it!  My mother's mantra when clothes shopping always was: if you don't want to wear it tomorrow because you love it so much, don't buy it.  I think the same applies to dressing your home.  No settling. (But bargain hunting for similar looks you love at cheaper prices, always encouraged!)

In any event, I went back to the Pottery Barn pendant that I had really loved during my extensive search.  Once I started accessorizing the kitchen with the darker metal elements and put our chicken coop storage baskets under the island...I knew my original gut feeling had been the better choice. 

Brent made the best of my new decision.


It actually picks up the pattern
of the "fancy tiles" - something I hadn't even anticipated.


Another sign I am happier with this light...excessive picture-taking.  Light on!  Light off!  Pantry angle! Stove angle!  What does it look like when you walk in?  There were  no such pictures taken of the other light...


It really helps the darker stools relate to the stainless island,
repeats the chicken wire accessories, and the octagonal tiles,
as well as a little echo of my 70 cent artichoke?/pineapple? vase-thingy.

So now, I am totally in love.  We still have the other pendant if any one is looking for a really cool, slightly modern clear pendant!

Saturday, September 1, 2012

Piercing the cabinets' ears

Today our little cabinets really grew up - they got their earrings!

Knobs and pulls...

Brent ordered this very helpful template kit that made my job much faster today.

I started by selecting a hole on the template that I felt looked the best.  This was simple trial and error of marking the hole with a pencil and then holding up the knob.


I then went around to all of the doors and marked the spot to drill.  This template made it so fast, and far less nerve-wracking.


After all of the knob holes were marked, I worked on the pulls.

First, you line up your pull's screw holes with the template. Ours are the very common 3" distance apart.


 Then, it's best to block the rest of the holes to avoid a mistake.


Next was more trials to see which set of holes was the right distance from the top of the drawer.  Our plan was to center the pulls on the small drawers, and have the pull the same distance from the top on the large drawer.

Again - always good to make sure you only have access to the holes you decided on...


The best thing about knob and pull install? Instant gratification!


Our stove wall - all dressed up. This part of my day only took about an hour - including the decisions that had to be made - not bad.  Plus, now we can start USING the cabinets that have doors and drawers.  It looks like we will start moving back into the kitchen next weekend (after we "discuss" what will go where). (As in - your father and I aren't fighting...we were just having a discussion....)

Yeah. Right.  I predict the stove drawer will be hotly contested :)

Thursday, August 30, 2012

New trims

I guess there have been two sources of trim in the last 24 hours..

And then the trim in the kitchen.

Today, Brent set out on a mission to go from the mudroom door all the way over to the stove with baseboard, toe-kick, caulk, and door trim.  Quite a job!

The door to the basement went from...


to...

Thanks to some steps like...
Door trim cut to accomodate the counter and base cabinet


The breakfast bar/pantry cabinet area also got fancied up.

Where it started at 6:30 this morning


Brent worked his way over

Trim makes SUCH a difference!


Breakfast bar all gussied up! (with crap on the counter...)

Tomorrow is onto the nook - lining the message cabinet with foam core and cork board, creating the face frame and spraying it gray, and perhaps the under cabinet lighting over the sink wall so we can move onto window trim and...dare I say...backsplash? Still hoping to have everything finished by 10/1..so we can have a kitchen warming party in Oct!

Saturday, August 25, 2012

Where to knob...that is the question!

As I stand, frequently, in our getting-nearer-to-looking-done space, I of course only care about the superficial decisions to be made...like where to put the knobs!

I've been looking at lots of photos on houzz.com to try to get some data as to where people put their knobs on shaker-style cabinets...and it seems to be a mixed bag with some putting them in the exact bottom or top corner of the door, and others purposely NOT on the corner.

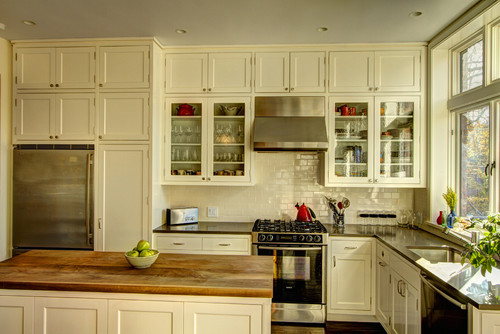
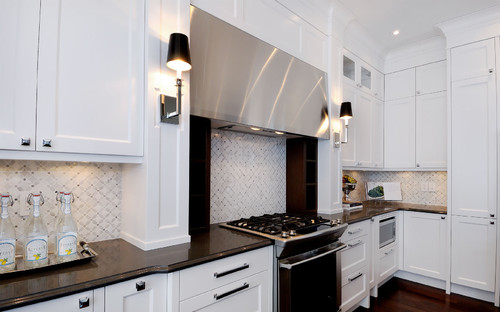
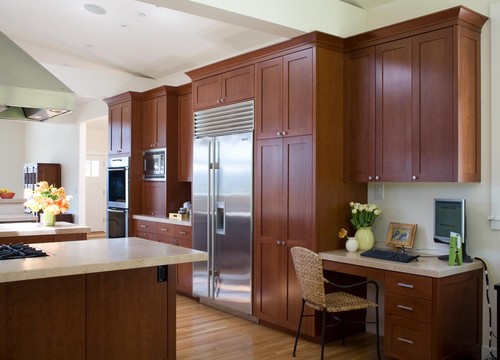
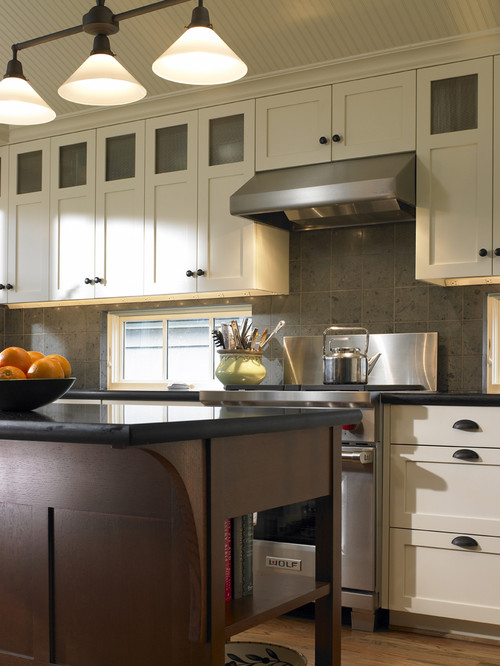
Here are some examples of what I mean...

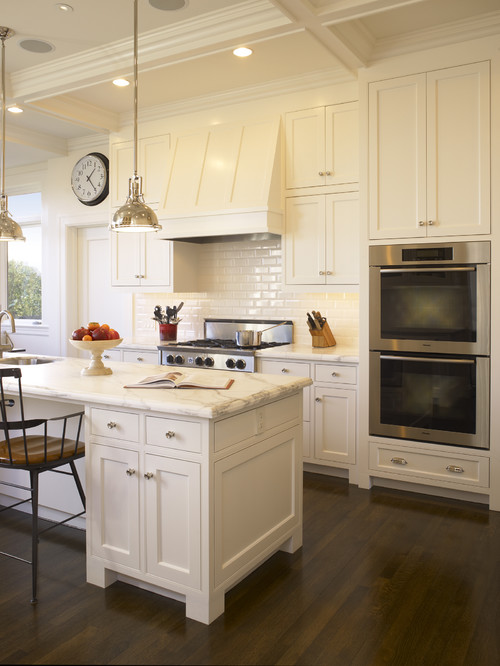
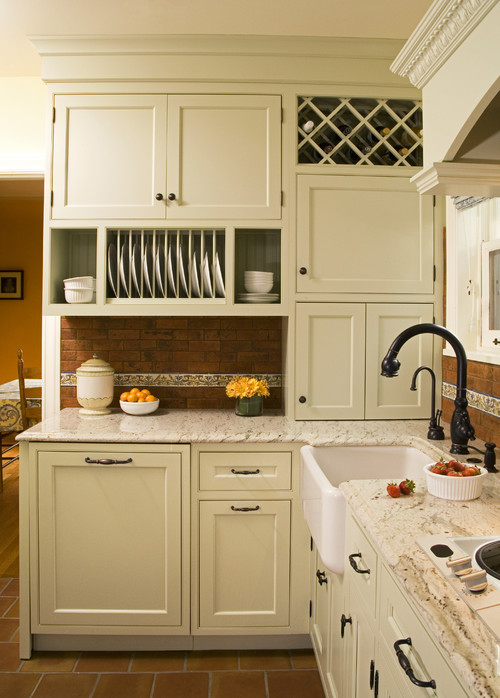
Centered in the corners:


NOT centered in the corners:


We originally preferred the NOT centered knobs, however, this is complicated by our super-high square cabinets that really can only have the knobs at the bottom of the cabinet, or they will be even LESS user-friendly... (still looking for step stool options...send them my way!)


So then...do we do all in the corner? Square doors in the corner and the rest of the cabinets NOT in the corner? Thoughts?